|
Live Rock
by Clayton Romie
Live Rock ? What the hec is live rock ? Is that like a Pet Rock ?
Live rock is rock that has been collected directly from the ocean and
contains many of the life forms that resided on it when it was submersed
in the water. These life forms consist of sponges, corals, crabs, shrimps,
various algae's, and a tremendous amount of natural bacteria's. It's this
life that makes this rock alive.
Aside from the many forms of sponges, corals, and crustaceans, which
all add to the dynamics of a reef tanks eco-system, the natural bacteria's
play a significant roll in the development of a reef tank. These bacteria's
provide a large portion of the biological filtration that occurs in the
tank.
The general approach to a reef tank is to have a wet-dry filter, complete
with bio-media, placed below the aquarium. Using live rock in the tank
can, in most cases, actually replace the need for the bio-media in the
filter ( see Reef
Tank Methods ).
Live Rock comes from many places around the globe. Today it is imported
from Tonga, Fiji, Samoa and the Marshall Islands. Florida Base Rock was
the original choice for reef tanks but due to passage of State and Federal
Laws it is no longer available and collection of it is restricted.
Picking out your live rock should happen after you've done a bit of thinking.
First thing you need to determine the size of your tank. The standard is
two pounds of live rock per gallon of tank capacity. By all means, you
can use more or less.
Types of rock:
Florida Base Rock ( no longer available ) was composed
of compressed calcareous sediments and coral skeletons. It was quite dense
and resembled cement. It usually arrived with a large number of sponges
and some small corals. This type of rock was suggested for creating the
base foundation of the reef structure.

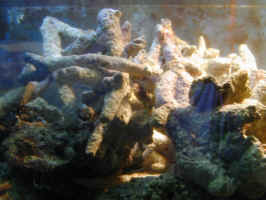
Tonga rock is the branching, pale colored rock. It is composed
of old coral skeletons. The rock is not very porous, so I would not recommend
using it for your entire tank, only for creating caves and overhangs and
for creating height.
Marshall Island Rock consists of old coral heads and branches,
which are kind of neat because the rock has lots of little crevices for
fish to dart in and out and for mounting corals.

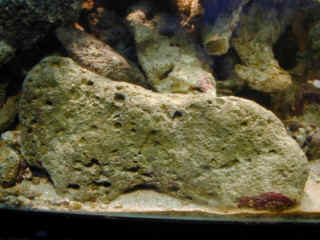
Fiji Rock is the most common. This rock is very porous which
allows for maximum biological filtration. I would recommend looking at
a few books that have pictures of coral reefs to get an idea on how you
want to construct your reef.
Slab Rock is a flat version of live rock. It is useful in situations
such as the cap, or top, of a cave or in tall narrow tanks
Photo courtesy of Sea-Critters.com
Aqua-Cultured Rock is the current 'eco-sensitive' version of
live rock. This rock was gathered from terrestrial quarries and placed
on the sea bottom. After a period of 1 to 3 years it will become inhabited
by the living creatures from that locale.
Picking out your rock:
After you've decided on what kind of reef you want, it's time to pick
out your rock. First off, you want to buy some large pieces for your reef
base, at the bottom of your tank. These pieces will be the main structure
and will need to be very strong. When you choose your pieces of rock, try
to smell the rock. If it has a bit of a foul odor, like rotten eggs, then
this is because some of the animals that lived on the rock died during
shipping. If so try to choose another piece. Rock that has this smell,
or death, on it is called un-cured rock, and can cause elevated biological
levels in the tank.
Curing the rock:
The curing process can be done in a couple of ways. You can cure the
rock in your tank, which will allow all the 'die-off' to remain in your
tank, or you can use separate containers, like trash cans. If you decide
to use separate containers, make up a 5 gallon bucket of salt water, and
then make up enough salt water to fill up your trash cans. Take the rock,
immerse it in the 5 gallon bucket of salt water and shake it to remove
any loose sediment or dead creatures, then place it in your trash cans.
After you have placed your rock in the containers, place either strong
aeration or strong power heads in the trash cans. This will help the rock
shed its debris and provide oxygen to the living inhabitants of the rock.
I would highly recommend buying a small protein skimmer to remove organics
that will be produced by the curing process as the rock can be poisoned
by its own debris. Do not illuminate the rock, this would only encourage
algae growth. The rock will take 4-6 weeks to completely cure. During this
time, make sure the water level in the trash cans stays stable by adding
RO or distilled water. If you don't, the salinity will raise and kill off
more organisms than you want. Take your time, don't rush the curing process
as this step ultimately determines the future of your reef tank.
Aquascaping:
After you've decided what kind of reef structure you want to build and
the rock has been cured, it is time to put the pieces together. This is
the fun, or artistic, part.
Start off with the large pieces of rock that you've chosen. Try to leave
as much space between the rocks on the bottom of the tank as possible,
this will allow for good water flow through them minimizing the collection
of debris. One thing you want to avoid is to create a structure that looks
like a department store shelf. You can cement your rock together by using
underwater epoxies and adhesives. For the more intricate structures consider
drilling holes in the rock and tie the pieces of rock together with plastic
zip ties ( tie wraps or cable ties). If you don't use cement or zip ties,
make sure your structure is stable and that it won't come crashing down
when you have that prize piece of coral perched on top (or below.) You
can double check on the stability of a rock tower by applying slight pressure
on it. After you've built your structure, slowly acclimate the rock to
the lights, starting off with only 3 hours a day and building up to a full
photo period. I would recommend adding Astrea snails and a herbivorous
fish like a tangs shortly afterwards to graze on the algae's that will
begin to grow once they receive light.
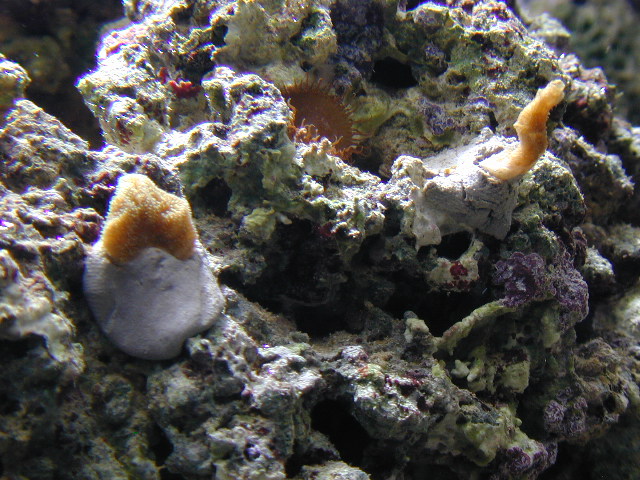
When designing a reef structure use your imagination! So often a reef
tank is a collection of rock placed in a manner that it looks like a single
slope from the back to the front. Get out your books and find pictures
of real coral reefs. Some have out-croppings, pinnacles, shear walls, and
valleys. Try to make spots that corals can either be placed on or in to.
Above all keep in mind the flow of water that moves around, through, and
behind the rocks. Strong water flow will bring the corals food and help
them to shed their debris, as well as, decrease the build up of sediments
that can cause algae problems.
|